转自:https://docs.cs.cf.ac.uk/notes/thunderbird-email-application/
Thunderbird is a portable mail application from Mozilla. It's available for Windows, Macintoshes and Linux systems and can be freely downloaded and installed.
Office 365 is a business software productivity service from Microsoft. Cardiff University has subscribed to Office 365 for its staff and student email and calendar service.
The University's IT Service recommends that users access Office 365 through a web browser (Outlook Web App) or through the latest Microsoft Outlook application program on Windows or Macintoshes.
But you can instead use Thunderbird for both mail and calendar access to Office 365. This Note tells you how to configure and use Thunderbird with Office 365.
Thunderbird and the University Mail and Calendar Service
Mozilla Thunderbird is a free, open source, portable and extendable email application from the Mozilla Foundation. It's installed on the School's Linux workstation in the Open Source Computing Laboratory (Lab 3) and is available for download from http://mozilla.org/thunderbird for installation on personal Windows, Macintosh or Linux workstations or laptops.
The University's email and calendar provision for staff and students is a hybrid cloud system using Microsoft's Office 365 business software productivity service.
The simplest way to access Office 365 is through a web browser at http://mail.cardiff.ac.uk/. Log in with your email address and University password to see your email with the Outlook Web App.
See http://sites.cardiff.ac.uk/office365/getting-started/ for information on how to use the Outlook Web App.
If you prefer to use a client application program to read your mail, there are several choices. Office 365 incorporates a Microsoft Exchange Server so you can use any client program that has appropriate Exchange protocols.
The University's IT Service recommends the use of the latest Microsoft Outlook application program on Windows and Macintoshes. Look at the Gettng Started page for information on Outlook and also links to configuration descriptions for iOS, Android, Windows and Blackberry mobile devices.
If Outlook isn't available for your platform, or if for licensing, cost, aesthetic or other reasons you prefer a different mail client, then read on to see how Thunderbird can be used instead.
This Note will tell you how to configure Thunderbird to access mail with with Exchange protocols using ExQilla, an Exchange Web Services (EWS) add-on for mail on Thunderbird. In addition, the Lightning add-on can be used to add calendar functionality to Thunderbird. There is an EWS provider plugin for Lightning that will let you use Thunderbird to access your Office 365 calendar.
Configuring Thunderbird
Thunderbird normally uses the Internet-standard IMAP protocol for reading email. But the University prevents its staff and students from using IMAP to access its Microsoft Office 365 system.
Thunderbird can also use Exchange Web Service (EWS) protocols to read and send mails if the ExQuilla add-on is installed.
ExQuilla is a paid-for plugin that costs US$10 per annum. However, there is a 60-day trial period when it is free. You can use this period to determine if you want to continue using ExQuilla or switch to a different application to access your mail.
For calendar access, Thunderbird has a free Calendar EWS Provider for Lightning originally from Michel Verbraak of 1st-setup.nl but now available from Babu Vincent at Ericsson. This is an good plugin that gives access to your Office 365 calendar and also allows you to set email vacation messages with start and finish times.
Connecting with Exchange Web Services Protocols
By installing the ExQuilla add-on to Thunderbird, you can use Exchange Web Services (EWS) Protocols to connect to Office 365 for reading and sending your mail.
Installing ExQuilla Plugin and Mail Account Setup
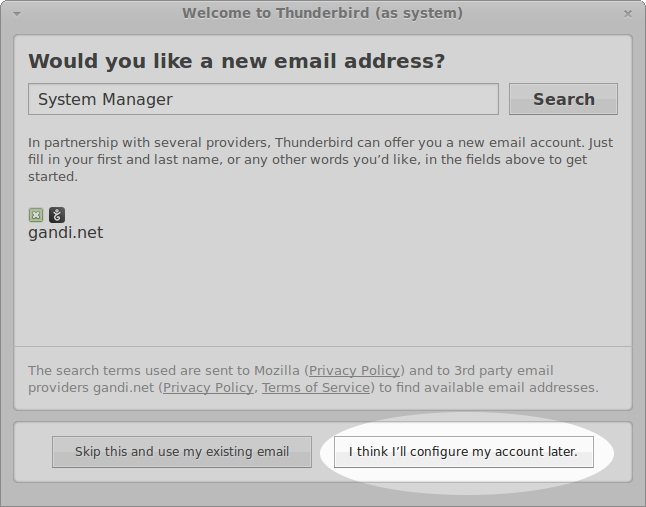
The first time you start Thunderbird, when it asks whether you want a new email address from one of Thunderbird's partners, click on I think I'll configure my account later.
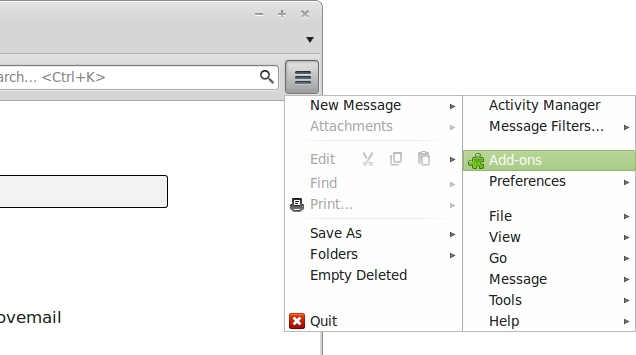
Click on the menu icon at the top right of Thunderbird and select Add-ons from the menu.
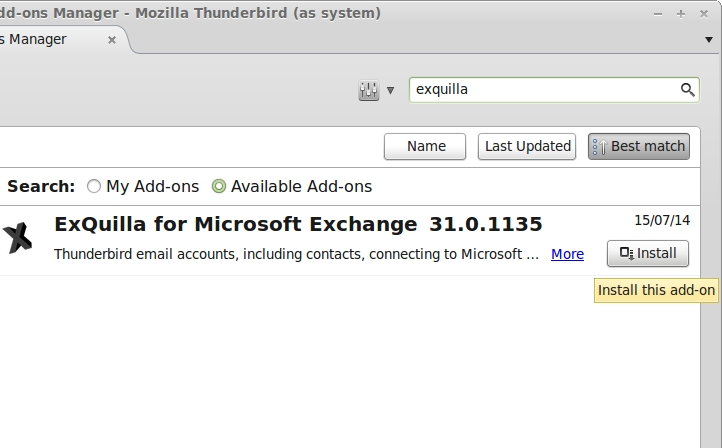
Type exquilla in the add-ons search field to find the ExQuilla for Microsoft Exchange plugin.
Click the Install to add the plugin to your copy of Thunderbird.
After ExQuilla has downloaded, a Restart now link appears. Click on this to restart Thunderbird and install the plugin.
After Thunderbird restarts, an extra After Installation tab is shown that tells you how to connect to your Microsoft Exchange account. Read that or follow the instructions here.
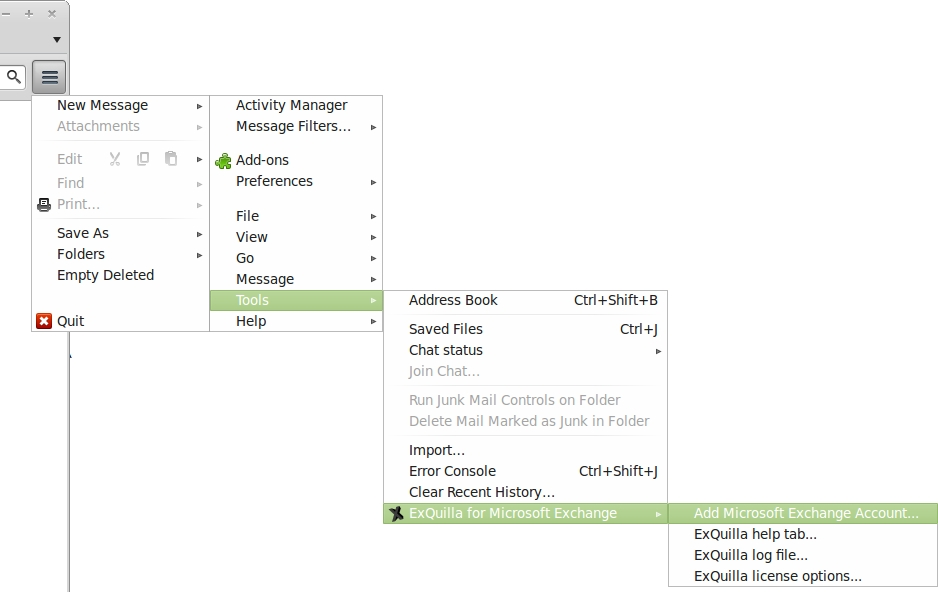
From the menu icon, select Tools->ExQuilla for Microsoft Exchange->Add Microsoft Exchange Account....
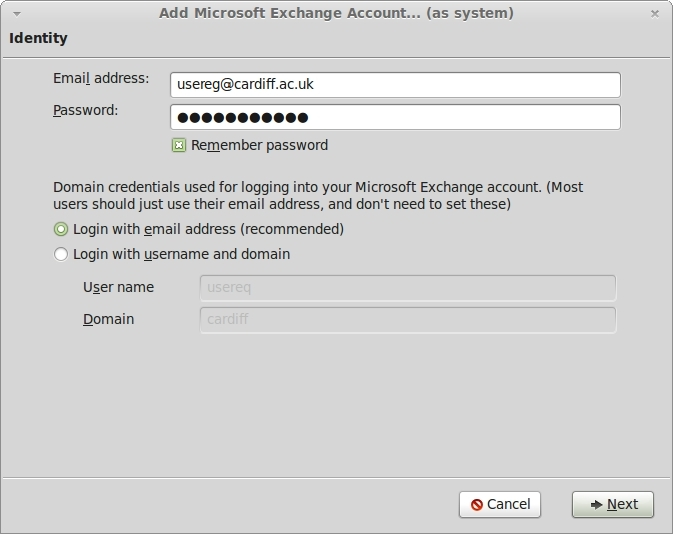
Enter your Cardiff email address and your University password in the fields on the Add Microsoft Exchange Account panel. Select Login with email address. Click the Next button.
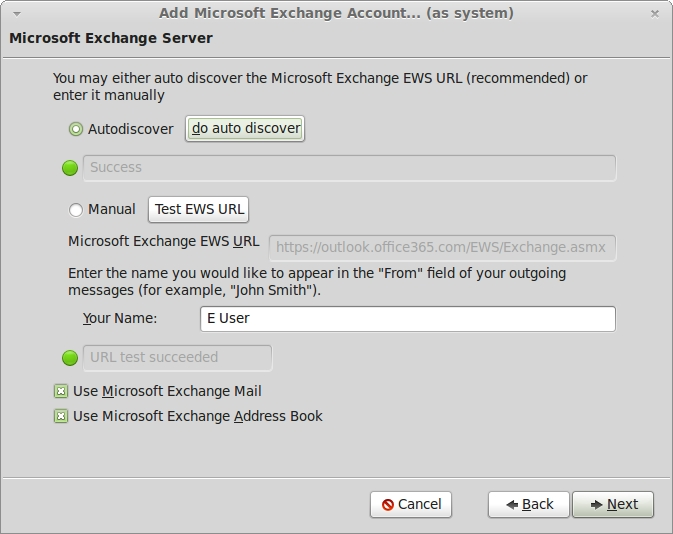
You can configure your Office 365 account automatically.
Click do auto discover and ExQuilla will lookup your account settings.

When auto discover succeeds, your EWS URL will be https://outlook.office365.com/EWS/Exchange.asmx.
See that Use Microsoft Exchange Mail and Use Microsoft Exchange Address Book are ticked and click Next.
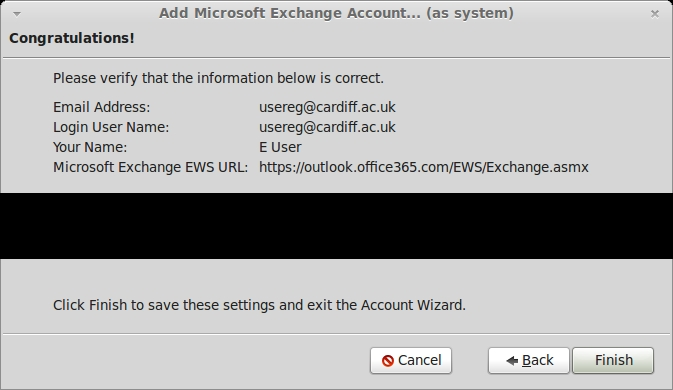
Your Exchange account is now configured and the acount wizard shows you the settings.
Click Finish to save the settings.
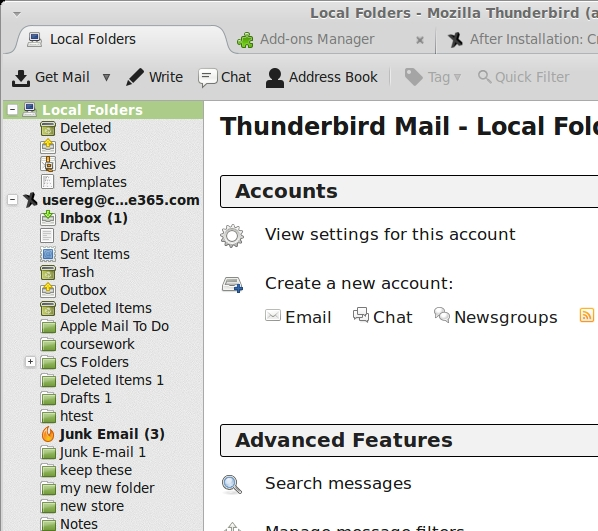
Your account and the mail folders in it are listed in the left side margin.
Click on INBOX to see its messages.
Configuring the Office 365 Calendar
Installing Calendar Plugins
Note that newer versions of Thunderbird come with Lightning automatically installed. If you have an older version, or if you want to re-install Lightning, follow these instructions.
Thunderbird can be used to access your Office 365 Calendar through the Lightning and Calendar EWS Provider plugins. Click on the menu icon at the top right of Thunderbird to select Add-ons.
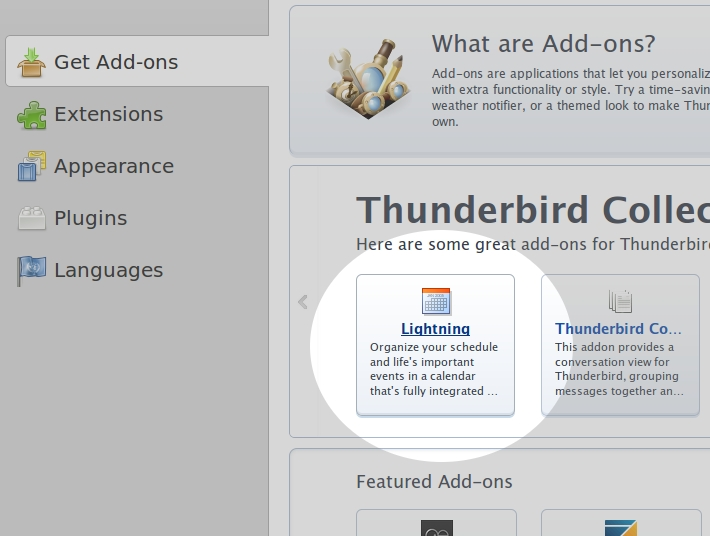
Lightning is a featured add-on and is shown in the Get Add-ons pane. You may also find it by typing lightning in the search field. Click on the Lightning install button to go to its installation page.
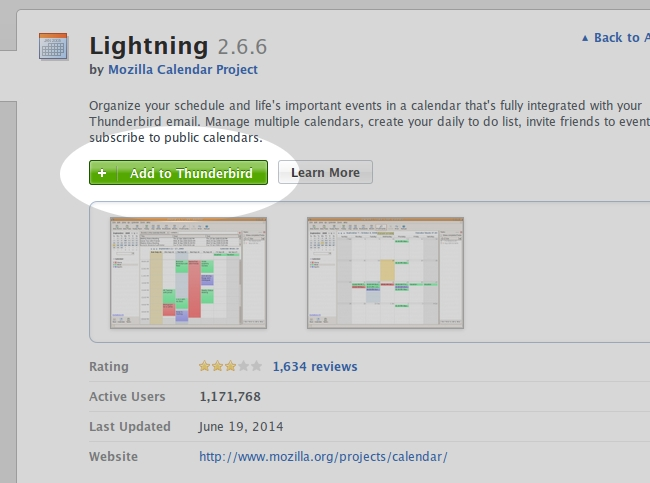
In the Lightning installation page, click Add to Thunderbird to download Lightning.
In the Installation window, click on the Install Now button to install Lightning.

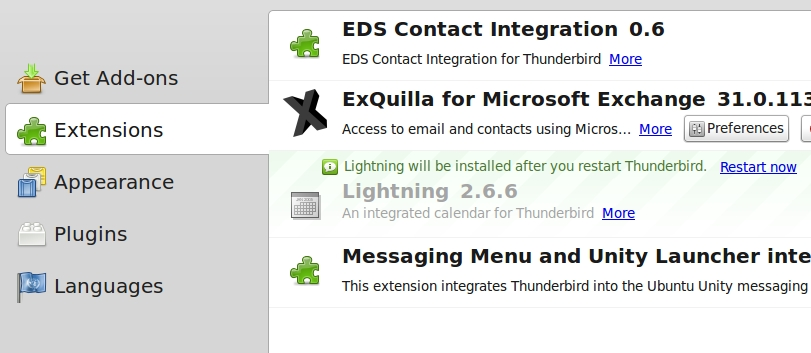
Lightning will be installed when you restart Thunderbird.
In some cases, it's also necessary to enable Ligntning explicitly. Look in the Extensions pane, if Enable appears alongside Lightning, click it. Otherwise just click the Restart now option.
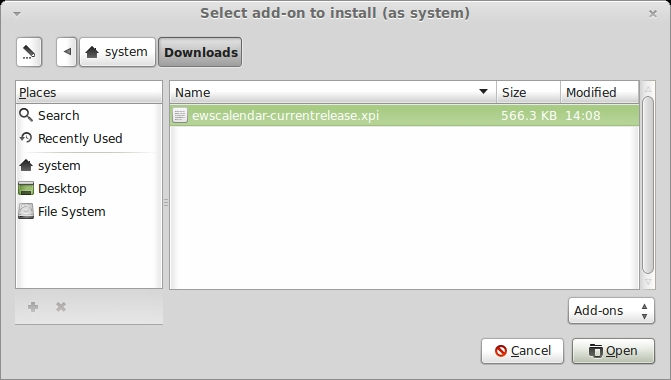
Now you can add the EWS Calendar Provider. The latest version of the Provider can be downloaded from https://github.com/Ericsson/exchangecalendar/releases. Download the file with your web browser and save it to your local computer.
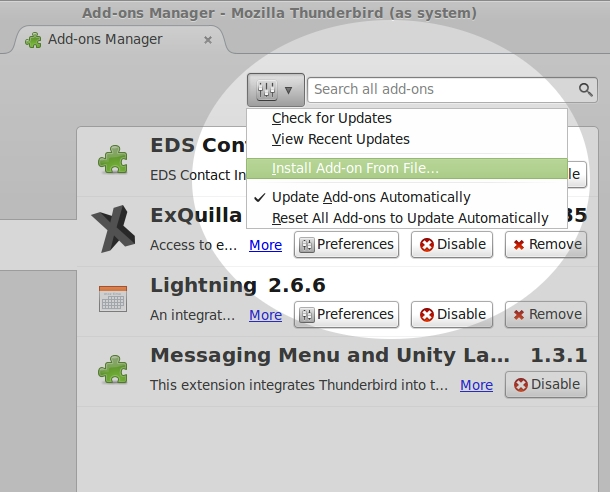
In Thunderbird's add-ons panel, click the Tools button to the left of the search field and select Install Add-on From File.
Locate the XPI file you downloaded and Open it to start the installer.
Click Install Now once the installer is ready.
Afterwards, click the Restart button at the top of the panel to restart Thunderbird and complete the installation.

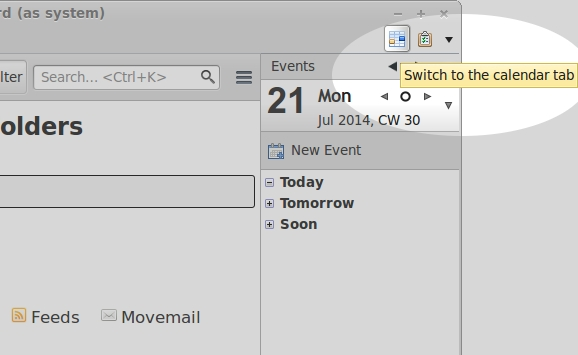
With Lighnting installed, there's a switch to calendar tab icon at the top right of Thunderbird.
Connecting To Your Office 365 Calendar
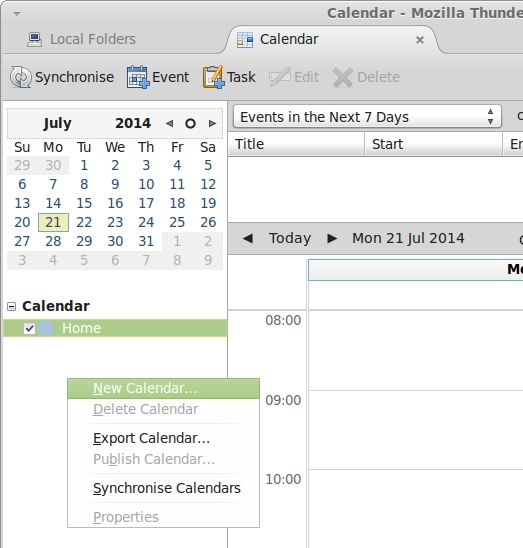
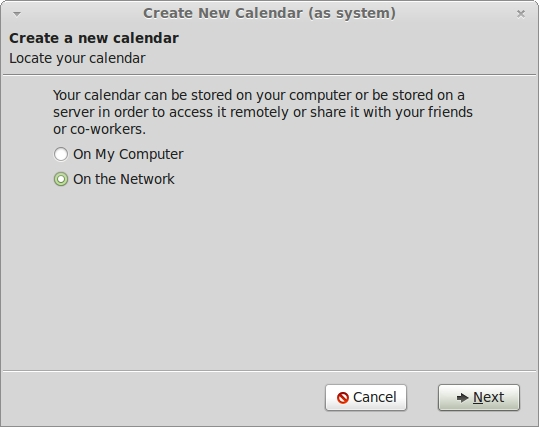
In the Calendar tab, click the right mouse over the left side margin and select New Calendar.
Choose On the Network in the Create New Calendar window and click the Next button.
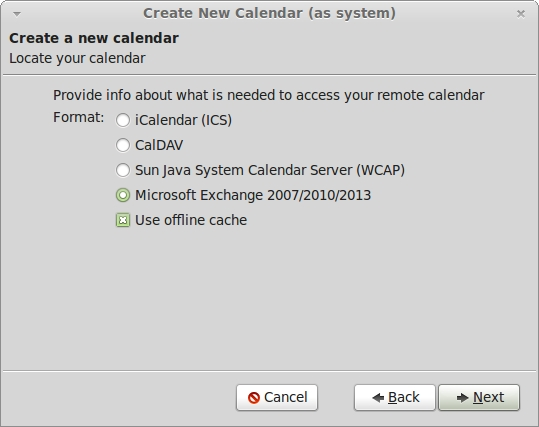
Select Microsoft Exchange... and Use offline cache and click the Next button.
Now give your calendar a name, which will be used within Thunderbird, and click on the colour button to choose a display colour for it.
Click the Next button.

You can now specify the details to connect to your Office 365 calendar. The autodiscovery won't work so you must enter the values yourself.
The server URL is https://outlook.office365.com/EWS/Exchange.asmxand the email address and username are each mailname@cardiff.ac.uk.
Type these into the fields and click Check server and mailbox. Enter your University password when prompted.
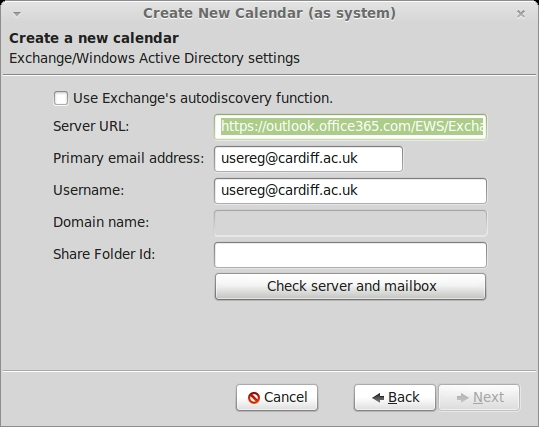
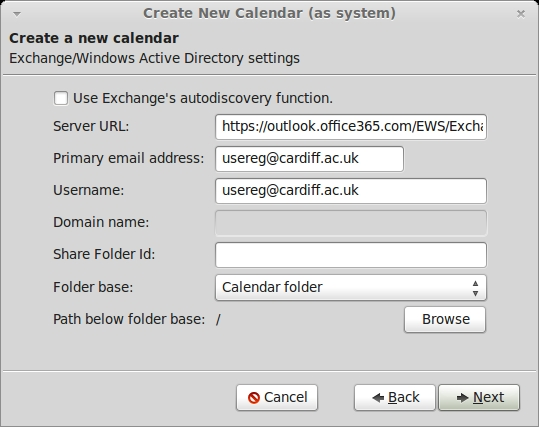
If you have entered the details correctly, the calendar is now set up.
Click Next and then Finish in the next window.
Your Office 365 calendar now appears in Thunderbird's calendar tab.
Using Thunderbird
Getting Started
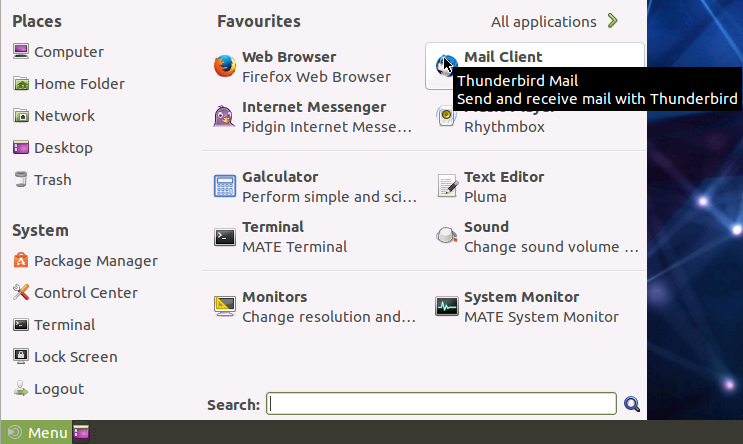
If you have installed Thunderbird on your own Linux, Windows or Mac OS X system, start it from the appropriate menu or icon.
Thunderbird is installed in the School's Linux Laboratory. Start it from the Mate Menu favourites panel.
It is also in the Internet category sub-menu.
When Thunderbird starts up, the name of the account you have configured will appear in the Folders panel, Click on Read messages in the main panel to open a connection to the mail server.
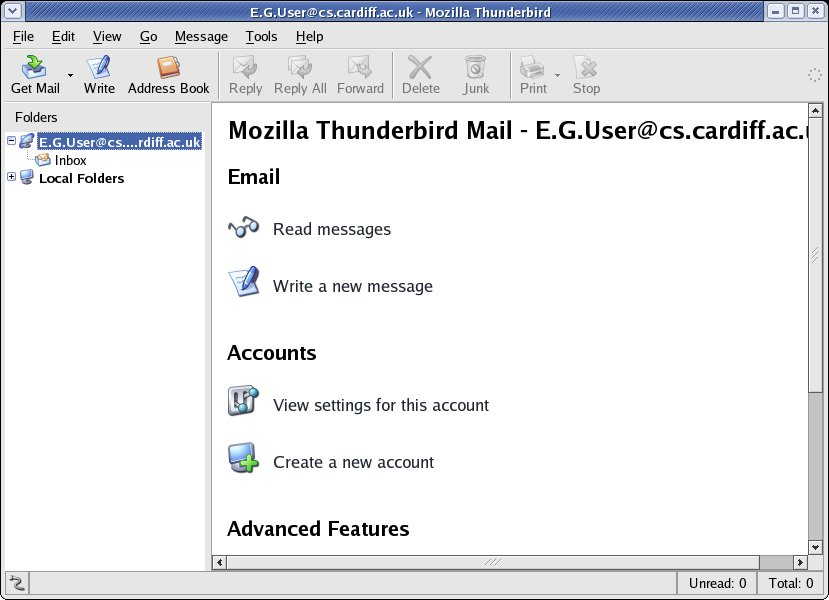
If Thunderbird asks you for your password, type in your University password and click the OK button.
Reading Your Mail
The folders include your Inbox. Click on Inbox to show your current mail messages.
The messages in your mail box are listed in the upper right panel. Click to select a message for its contents to appear in the lower panel.
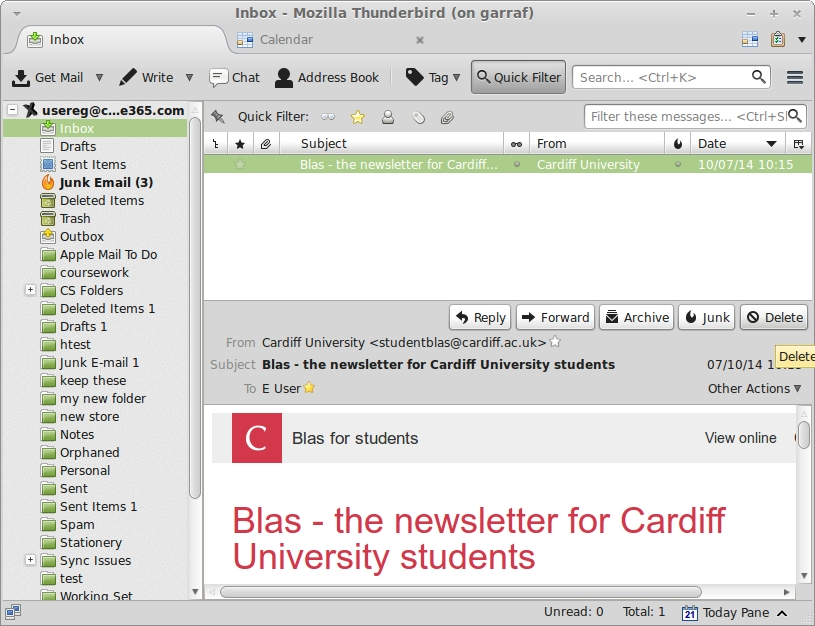
You can change the current message by pointing and clicking the mouse at a different message in the list. Use the scrollbar to access parts of the list that are not visible.
Deleting a Message
To delete the current message click on the Delete icon Image tDel at the top of the message body.
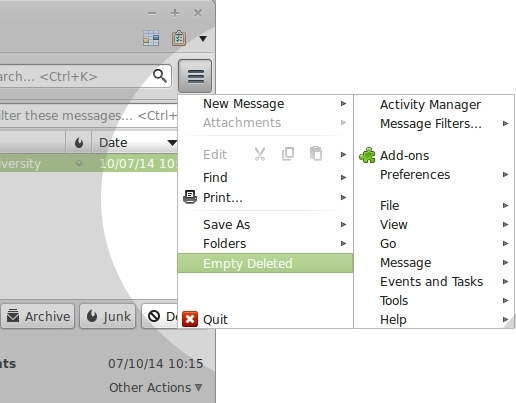
The deleted message is transferred to the Deleted mailbox folder within your account. To remove deleted messages permanently, select Empty Deleted from the Thunderbird menu.
Sending a Message
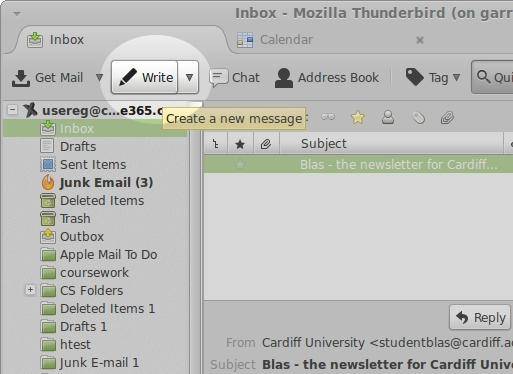
To create a new mail message, click the Write icon in the top toolbar.
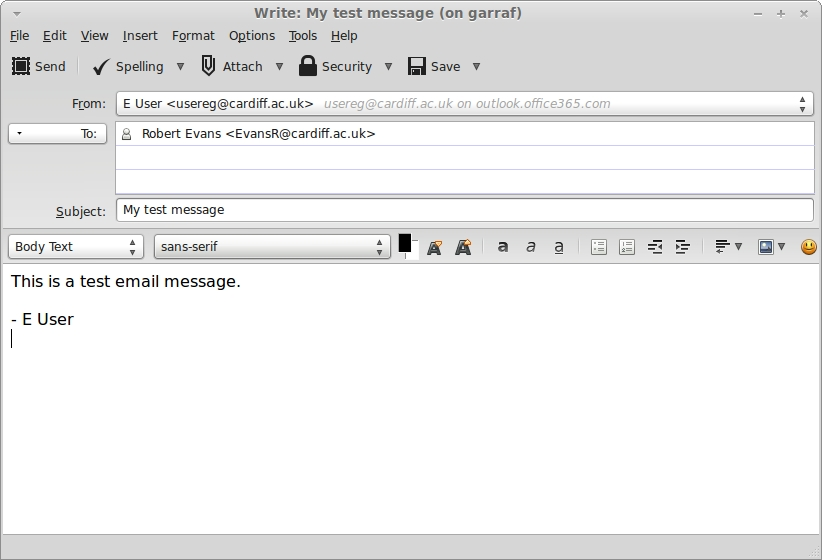
Enter the name of the recipient in the To field. Click on the To field button to get other options such as Cc. Put the subject of the mail in the Subject field and type the body of your message in the main panel.
The first time you send mail, if your didn't ask Thunderbird to remember your password when you set up the account, you will be asked for your password. Type in your University password and click the OK button.
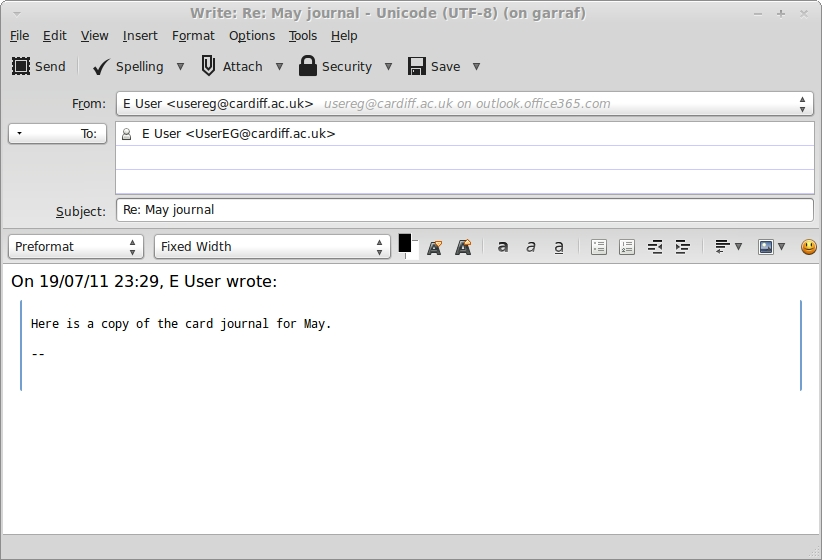
Replying to a Message
If your new message is in response to the current message, you can create a reply by clicking on the Reply icon in the toolbar above the message body.
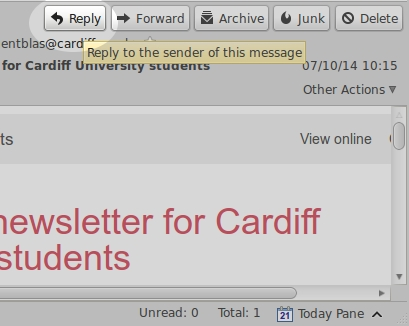
The To field is filled in with the original sender's address, and the body of the message is quoted in the message panel.
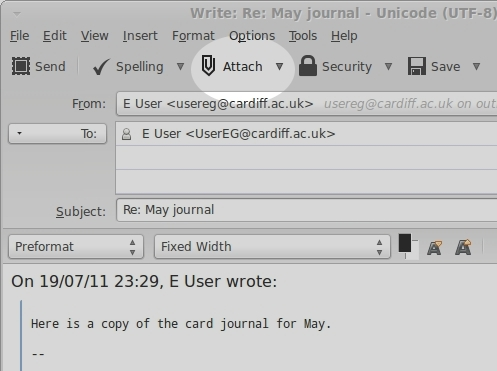
Attaching Files
You can email a file along with your mail by attaching it to the message. To attach a file to a messages, click on the attach icon in the toolbar.
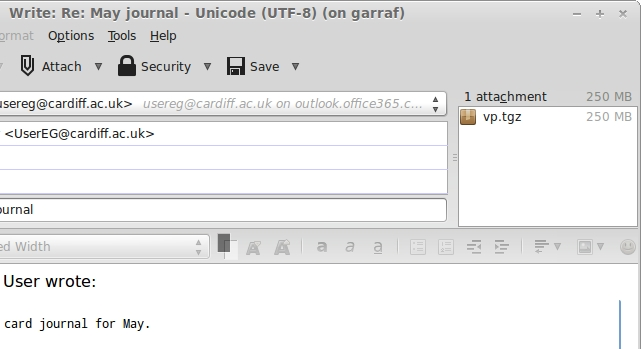
Use your workstation's file selector to browse your directory and find the file you want to attach.

The name of the attached file appears in the top right panel.
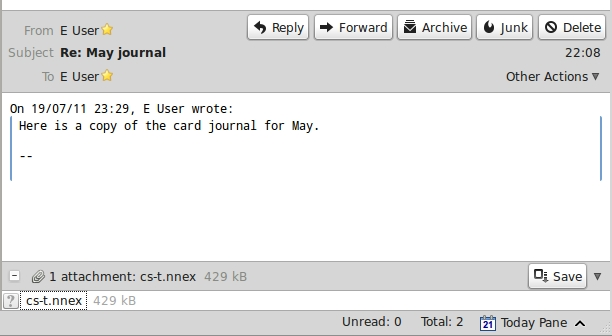
Viewing an Attachment You've Received
When you receive a message containing an attachment, the attachment's name will appear at the base of the message panel.
Double-click on the attachment's name to open an application to view the file, or use the Save button to save a copy of the file in your local file space.
Moving a Message to Another Folder
You can create new mailbox folders where you can store any messages that you want to keep. You should create these in your mail server account (UserEG@cardiff.ac.uk in this example), so that the mailbox folders are accessible however you log in, and so that they are in secure, backed-up file space.
In the Folder Bar, click the right mouse button on your account's entry and select New Folder from the menu that appears.
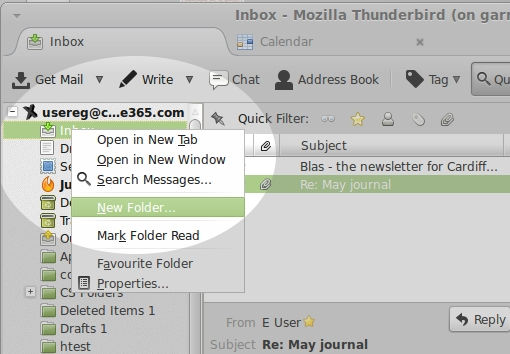
Type a name for the mail folder in the Name field in the New Folder window. Make sure the name of your mail server account is shown in Create as subfolder of and click the Create Folder button.
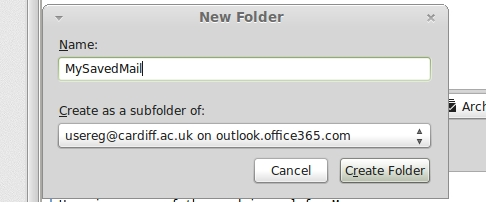
The new folder appears in the list in the Folders panel.
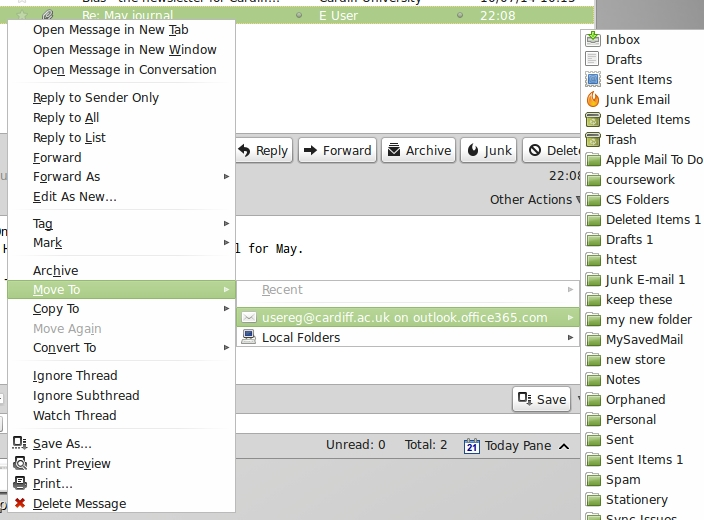
You can transfer a message from the Inbox into the new folder by holding down the left mouse button over the message and dragging it to the new folder.
Alternatively, use the right mouse button over the message to get the Move to menu and find the mailbox in a list.
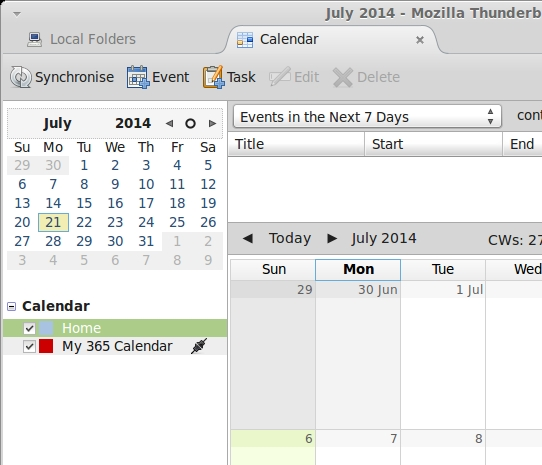
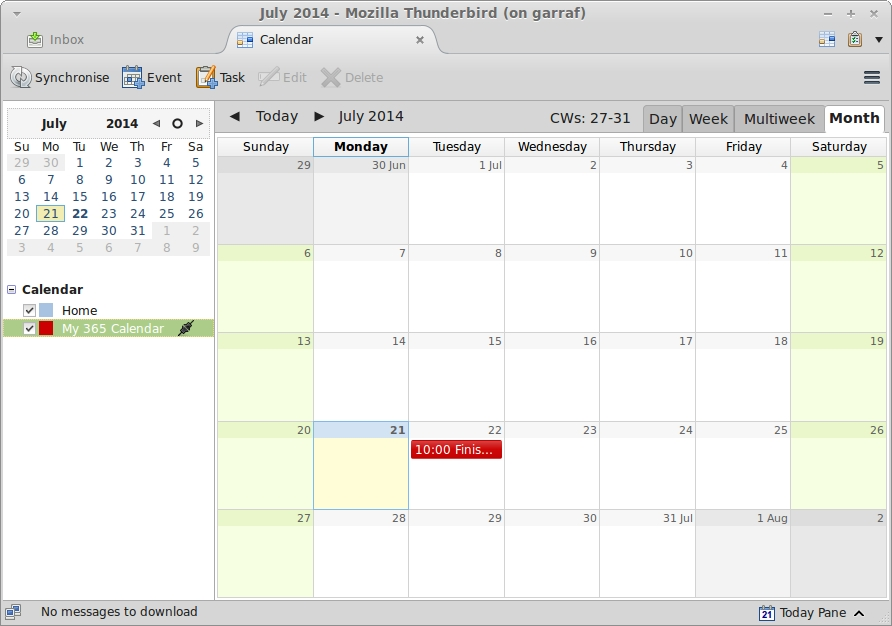
Using the Calendar
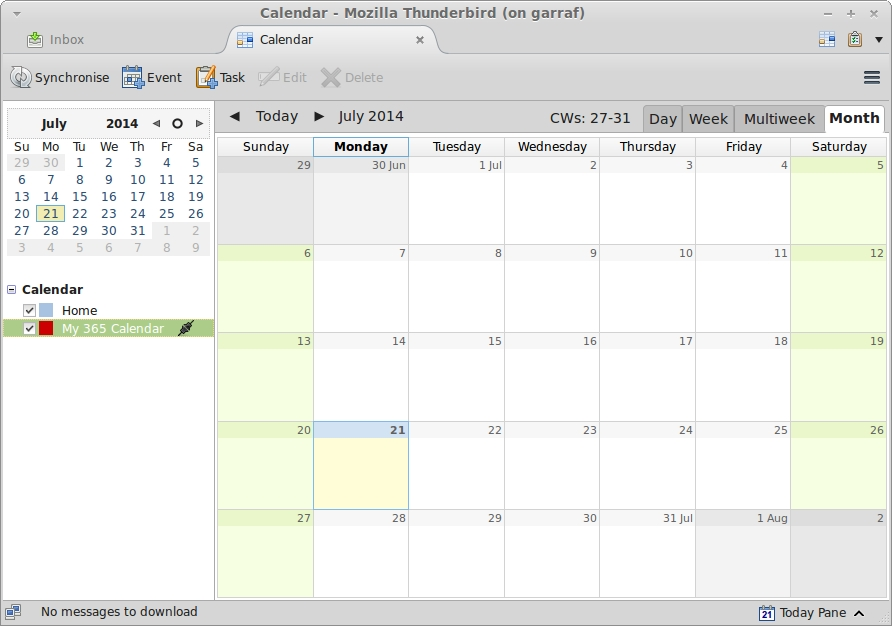
Click on the switch to calendar tab icon Image cicon to change to the Lightning calendar tab.
Here we have closed the events and tasks panels, and have chosen to display a whole month.
Highlight your Office 365 calendar in the list so that events you add will be placed in that calendar (and not the local Home calendar).
Adding an Entry
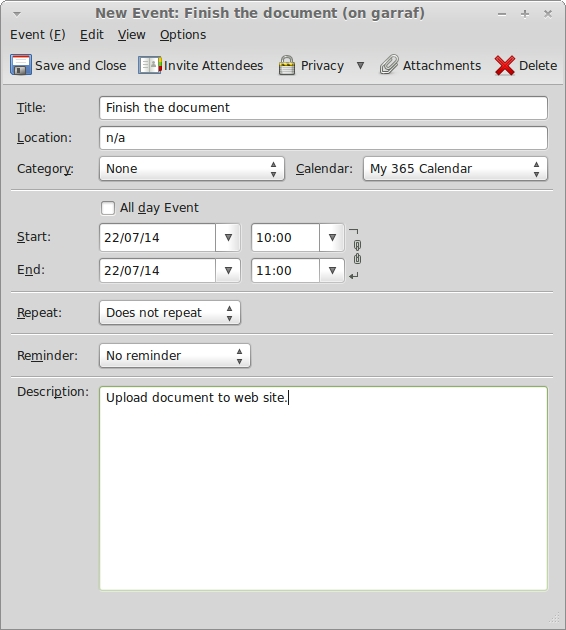
To create a new entry in your calendar click the Event icon Image cevent in the top toolbar.
In the new event window, enter a title and location, set the date and time and type a description. You can also set a reminder to be given in advance of the event.
Make sure the calendar is set to the name you gave your Office 365 calendar when you configured Thunderbird and click Save and Close to add the event to your calendar.
The event appears in your calendar as shown here.
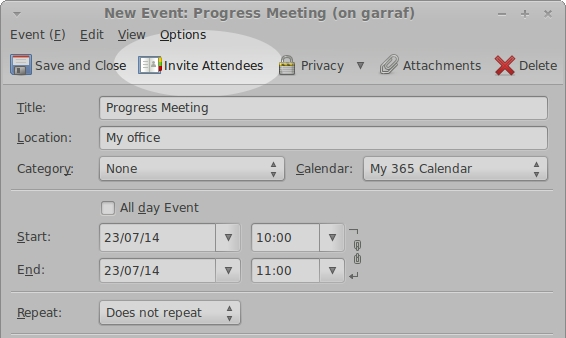
Inviting Colleagues to an Appointment
When you create an event, you can send invitations for other people at attend it.
Click on the Invite Attendees icon in the toolbar.
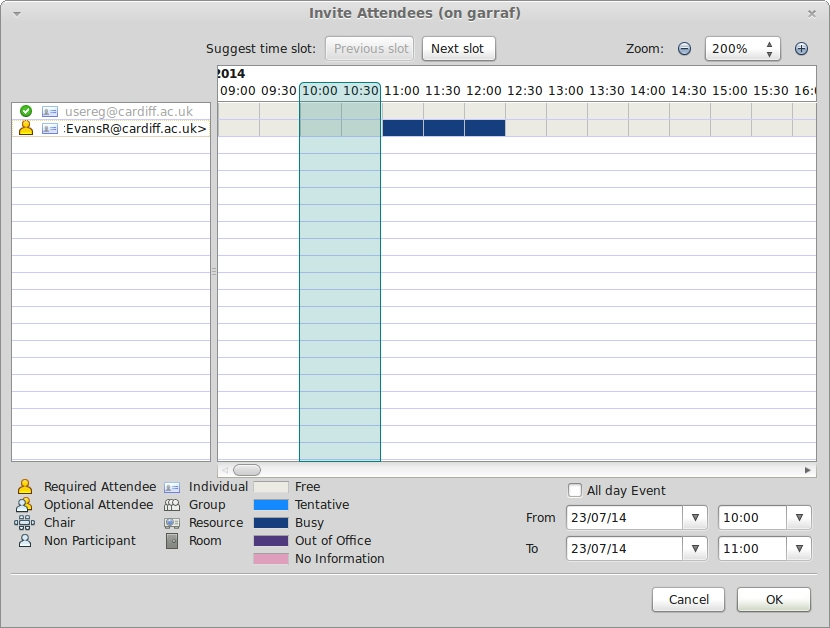
In the Invite Attendees window, type the email address of the colleague you want to invite to the meeting.
The calendar application checks the invitee's Office 365 calendar and will show you if the time you have chosen is free or busy. This gives you the opportunity to move the appointment.
Responding to an Appointment
When you receive an appointment request, an event will appear in your calendar. Its colour is whiter than the one you chose for your calendar. This indicates it is a tentative appointment and that you need to take some action to accept or decline the it.
Right click on the appointment in your calendar to see the Attendance menu.
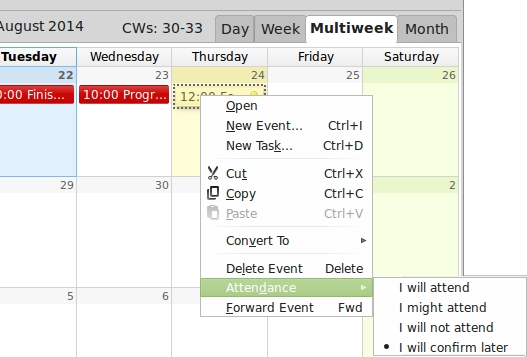
Your response can be sent to the user who sent the invitation.
Thunderbird prompts for your answer.

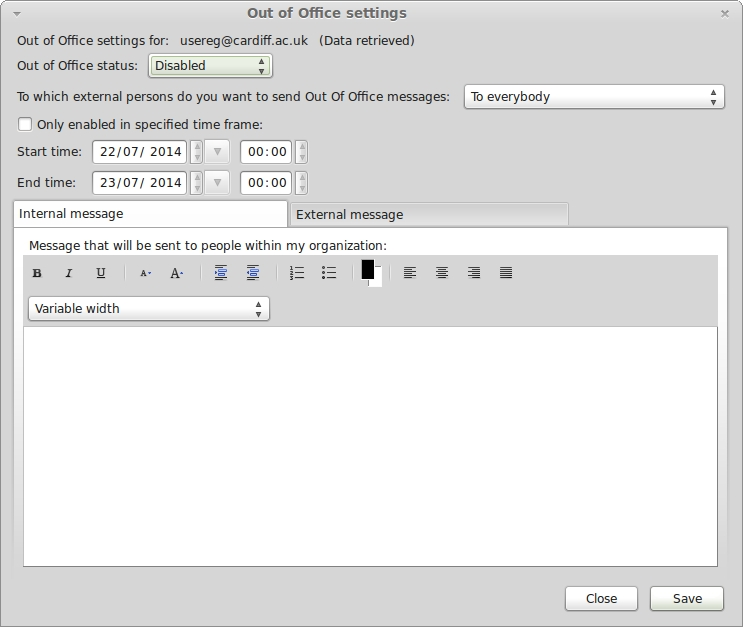
Setting a Vacation Message
Click the right mouse button over the name of your calendar in the list on the left.
Choose Out of Office settings from the menu.

In the Out of Office window, you can Enable the vacation message, give it a start and end time and date, set what the message is and who should receive it.
Click Save when done.
Further Details
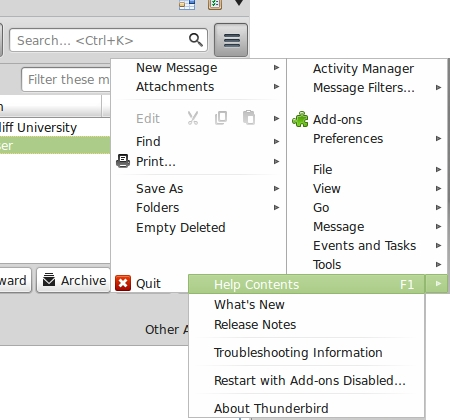
Choose Help from the Thunderbird menu to see the contents of the Thunderbird support site.